In 3D visualization, lighting is the equivalent of sight. It defines how we interpret an image’s reflection, depth, and emotion.
When we look at a 3D-rendered product, what we perceive as its sharpness, texture, or even how “REAL” it feels is often a direct result of the lighting choices.
HDRI lighting for product visualization captures real-world lighting conditions with excellent accuracy, recording both the brightest highlights and the deepest shadows in a scene. When applied to your 3D renders, this creates 100% photorealistic renders that traditional lighting setups can’t achieve.
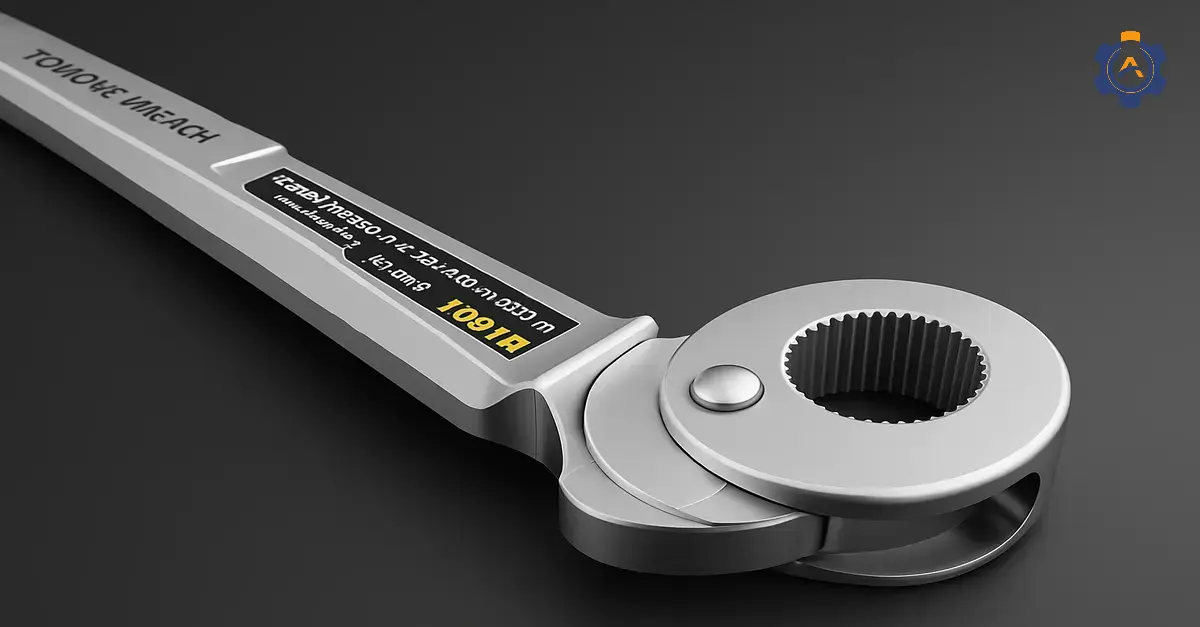
A manufacturing component rendered with HDRI lighting doesn’t just show what the product looks like but it demonstrates how it exists in the real world, how it reflects light, how shadows form around it, and how its materials interact with its environment.
3D lighting techniques for manufacturing incorporate three main setups: key light, fill light, and rim light. This trio highlights how light behaves in the real world, ensuring that a product’s curve and surface are accurately displayed.
One of the best benefits of hiring a 3D product rendering company is that they can really make a good render look great!
Key-Takeaways
3D renders are illustrations that make your product more visually appealing.
Lightning in a 3D render will highlight textures, forms, and cast shadows, shaping the viewer’s perception of product and materiality.
Using proper lighting techniques for 3D renders will create 100% realistic images.
Lighting is necessary because properly placed lights ensure clarity, making it easier for engineers, manufacturers, and investors to evaluate a product’s feasibility.
To achieve natural reflections, use HDRI maps or properly placed area lights.
Balance lighting by avoiding common mistakes such as overexposure, flat lighting, and unrealistic reflections.
Why is lighting necessary in manufacturing renders?
Here’s why lighting should be a top priority in manufacturing renders:
1) Accurately Shows Materials
Manufacturing industries involve a variety of materials, including metals, plastics, glass, and composites. The right lighting setup ensures that each material reflects light realistically. Because,
Metals need sharp reflections and contrast to showcase their sheen.
Plastics require soft yet defined highlights to avoid a cheap, unrealistic look.
Glass demands precise refraction and transparency to appear authentic.
Industrial buyers rely heavily on 3D visuals before purchasing. You risk losing credibility if your renders do not show real-world lighting effects.
2) Highlights Product Functionality and Design Details
The role of 3D rendering in the manufacturing industry communicates both design and function well. The best lighting for industrial 3D renders can bring out fine details like surface textures, seams, engravings, or moving parts.
Even a slight shadow can emphasize contours in industrial equipment, making the product appear more defined and ready for real-world application.
3) Creates Mood and Professionalism for Marketing Materials
3D Product rendering for product launches & trade shows, brochures, presentations, or online marketing establishes credibility, and a well-created render exactly does that. Here is how different lighting styles can influence perception:
Soft lighting for a premium, sleek look.
Harsh directional lighting to emphasize ruggedness in industrial equipment.
Warm tones to create an inviting, high-end appeal.
In manufacturing industries, buyers purchasing a machine or part invest in reliability, innovation, and efficiency. Lighting helps convey these qualities easily.
4) Improves Clarity in Product Demonstrations
Product rendering for prototyping and design feedback helps make a quick purchase decision.
Poor lighting can hide essential design elements, leading to misinterpretations and potential approval delays.
Properly placed lights ensure clarity, making it easier for engineers, manufacturers, and investors to evaluate a product’s feasibility.
What are the common lighting mistakes in industrial renders and how to fix them?
Lighting mistakes can make even the most well-designed 3D renders look unrealistic, unclear, or unprofessional.
Here are the most common lighting errors in industrial renders and how to fix them:
1) Overexposed or Underexposed Renders
Mistake: Too much light washes out textures and materials, while too little light makes details difficult to see.
Fix: Balance exposure using high-dynamic-range (HDR) lighting techniques and adjust intensity levels based on the material reflectivity.
2) Flat Lighting with No Depth
Mistake: Uniform lighting removes shadows and highlights, making the product look two-dimensional and lifeless.
Fix: Use a combination of key, fill, and rim lights to add depth and emphasize contours.
3) Incorrect Reflections on Metals and Glass
Mistake: Poor lighting setup results in unrealistic reflections, making metal look dull or glass appear like plastic.
Fix: To achieve natural reflections, use HDRI (High Dynamic Range Imaging) maps or properly placed area lights.
4) Harsh Shadows that Hide Product Details
Mistake: Extremely dark or sharp-edged shadows obscure fine details in industrial parts or machinery.
Fix: Use soft shadows with proper light diffusion to retain visibility while maintaining realism.
5) Unrealistic Color Temperature
Mistake: Using overly warm or cool lighting that misinterprets the product’s actual material color.
Fix: Keep the color temperature neutral to maintain accurate material representation (around 5000K–6500K).
6) Poorly Positioned Light Sources
Mistake: Placing lights at awkward angles, leading to glare or uneven brightness.
Fix: Follow product rendering lighting tips like three-point lighting principles- key light for main illumination, fill light to reduce harsh shadows, and rim light to add definition.
7) Ignoring Real-World Light Behavior
Mistake: Light behaves unnaturally, leading to unrealistic material reflections or an artificial look.
Fix: Using a 3D product rendering solution in the form of global illumination (GI) and physically accurate render settings to replicate real-world lighting behavior.
8) Not Testing Multiple Lighting Scenarios
Mistake: Using a single lighting setup that doesn’t work well for all viewing angles or environments.
Fix: Test different studio, natural, and industrial lighting conditions to find the best setup for each render.
Key lighting techniques for high-quality 3D renders
1) Three-Point Lighting for Balanced Illumination
This technique creates depth and avoids flat-looking renders. It consists of :
Key Light: The primary light source that defines the object’s shape.
Fill Light: Softens shadows to maintain detail in darker areas.
Back Light (Rim Light): Adds depth by separating the object from the background.
Pro Tip: In V-Ray, use an HDRI map with your three-point setup for more dynamic lighting.
2) Lighting Reflective Surfaces
When lighting metals or other reflective materials, you must manage how light interacts with surfaces to produce realistic reflections.
Soft Light Sources: Large light sources create smoother reflections, which is ideal for metals.
Specular Highlights: Control the glossiness of your metals by tweaking the roughness in shaders, particularly in Blender.
Environment Lighting: HDRI lighting in KeyShot provides natural reflections that help metals react realistically.
High-end automotive renders rely on HDRI lighting for ultra-realistic metal finishes.
3) Achieving Realistic Shadows in KeyShot, Blender, and V-Ray
Shadows add weight and a 100% realistic effect to 3D models. But bad shadow placement or lack of detail can destroy immersion.
Soft vs. Hard Shadows –
Use soft shadows for a natural look by increasing the light size or using area lights.
Use hard shadows for sharp, dramatic effects using small, direct light sources.
Ambient occlusion (AO) improves shadow depth and prevents floating effects.
Ray-traced shadows in V-ray tracing is enabled for more physically accurate shadow interactions.
4) HDRI Lighting for Highly Realistic Renders
HDRI (High Dynamic Range Imaging) environments provide realistic lighting without additional setup.
Ideal for outdoor scenes, metallic objects, and glass materials.
In Blender, HDRIs are used in the world settings to create immersive reflections and light diffusion.
In KeyShot, the HDRI editor allows you to customize lighting without adding extra light sources.
5) Directional Lighting
This technique greatly replicates the effect of sunlight by casting parallel rays across the entire scene.
Directional lighting is used in an outdoor environment. It can provide long, dramatic shadows and highlight surface textures when set at an angle.
6) Area Lighting
Area lights are larger light sources that emit light across a defined surface area, creating a soft yet comprehensive illumination.
This technique can replicate natural light sources like windows or skylights in an indoor environment.
7) Volumetric Lighting
Volumetric lighting, or “God rays,” creates visible beams of light that pass through the scene.
This effect adds atmosphere and can impact scale and volume.
Volumetric lighting is particularly impactful in foggy or dusty environments or scenes where the light interacts with particles in the air, like sunlight streaming through a window in a dusty room.
Optimization of lighting for different manufacturing materials
Here are key considerations for optimizing lighting for different materials:
1) Metals
Metals are durable and reflective and require glare control.
Lighting Solutions:
Diffused Lighting: Reduces glare from polished or reflective surfaces.
Low-Angle Lighting: Highlights surface defects by casting shadows.
Polarized Lighting: Minimizes reflections for better visual inspection.
Color Temperature: Neutral white (4000K–5000K) for accurate color rendering.
Adjustable Brightness: High-intensity task lighting for precision work.
2) Plastics & Polymers
Such materials varies from transparent to opaque, needing clarity checks.
Lighting Solutions:
Backlighting: Helps detect bubbles, cracks, or inclusions in transparent plastics.
Even Shadow-Free Lighting: This is used to inspect the surface finish
UV Lighting: Detects impurities or fluorescence in certain polymers.
High CRI (Color Rendering Index >90): Ensures accurate color matching.
3) Plastics & Polymers
These materials are transparent/reflective and demand defect visibility.
Lighting Solutions:
Dark-Field Lighting: Highlights scratches, chips, or cracks by illuminating edges.
Coaxial Lighting: Reduces glare when inspecting reflective surfaces.
Backlighting: Checks for bubbles or distortions in glass.
Blue or Green LEDs: Improves contrast for defect detection.
4) Wood & Composites
These two materials have textured surfaces with natural imperfections.
Lighting Solutions:
Warm White Lighting (3000K–3500K): Improves natural wood appearance.
Directional Lighting: Highlights texture for sanding/polishing inspection.
High-CRI LEDs: Ensures accurate color grading for finishes.
UV Lighting: Detects glue residues or coatings.
5) Rubber & Elastomers
These materials are matte or glossy and require flaw detection.
Lighting Solutions:
Low-Glare Lighting: Matte-finish LEDs reduce reflections.
Red or Blue Light: Enhances contrast for detecting surface flaws.
Structured Light (Laser Projection): For 3D inspection of molded parts.
6) Composite Materials (Carbon Fiber, Fiberglass)
Here, fiber alignment and resin checks are essential.
Lighting Solutions:
Multi-Angle Lighting: Reveals fiber orientation and defects.
UV Light: Detects resin inconsistencies or curing issues.
Infrared (IR) Thermography: For detecting hidden voids or defects.
Lighting setups for common manufacturing use cases
1) Assembly Lines
High-Bay LEDs (100-500 lux) – Bright, uniform light for general work.
Adjustable Task Lights – For accurate tasks (e.g., wiring, small parts).
Anti-Glare Diffusers – Prevent eye strain under long shifts.
2) Manufacturing Units
500-1000 lux high-output LEDs.
Machine-mounted work lights (IP65 rated).
Under-hood illumination for control panels.
3) Warehouses & Storage
Motion-Activated High-Bays – Saves energy in low-traffic areas.
Narrow-Beam Aisle Lights – Improves visibility in high-rack storage.
Emergency Backup Lighting – Critical for power outages.
4) Quality Inspection Stations
High-CRI LEDs (90+) – Reveals true colors for defect detection.
Ring Lights & Magnifying Lamps – For detailed component checks.
Dimmable Options – Adjust brightness based on inspection needs.
5) Cleanrooms (Pharma)
Sealed LED Panels – Prevents dust contamination.
ESD-Safe Lighting – Avoids static damage to sensitive components.
6) Foundries & High-Heat Zones
Heat-Resistant LEDs – Withstands extreme temps (150°C+).
Red/Amber Lighting – Reduces glare near molten metal.
7) Packaging & Shipping
LED Strip Lights Over Conveyors – Improves clear barcode scanning.
Portable Work Lights – Flexible lighting for varied tasks.
Software-specific lighting tips
1) Blender
Use Eevee for real-time rendering with baked lighting and cycles for ray-traced photorealism.
Cycles benefit from soft shadows and area lights for realistic results. Eevee requires tweaking screen space reflections and bloom to simulate realism.
In cycles, use light path bounces strategically to reduce diffuse bounces for speed but maintain enough glossy bounces for reflections.
2) KeyShot
Use KeyShot’s built-in HDRI lighting presets for realistic reflections and shadows.
While HDRI is great for general lighting, add physical area lights for product highlights.
Use the ground shadow feature to create natural-looking shadows without complex setups.
3) 3ds Max + V-Ray
Use high-quality HDRI maps with V-Ray Dome Light for realistic global illumination.
Load IES light profiles from real-world manufacturers to simulate precise industrial lighting.
Optimize render times by enabling adaptive sampling, which efficiently reduces noise in darker areas.
4) Cinema 4D + Redshift
Use Redshift’s physical sun and sky for accurate daylight simulations.
Improve indoor lighting realism by placing portal lights near windows.
Adjust threshold values to speed up rendering without losing detail.
5) Maya + Arnold
Use area lights with quadratic decay for natural falloff.
Pair with soft shadows and ambient occlusion for better realism.
Control which objects specific lights affect, optimizing render efficiency.
Future trends in 3D lighting for manufacturing
Future trends in 3D lighting for manufacturing include:
AI-Driven Adaptive Lighting – Smart lighting systems that adjust automatically for better visualization and accuracy in digital twins.
Ray Tracing & Real-Time Rendering – Improved realisticity for product prototyping and simulations.
VR/AR Integration – Immersive lighting effects for interactive training and virtual factory setups.
Photorealistic Digital Twins – Advanced lighting to improve real-time monitoring and predictive maintenance.
Energy-Efficient Simulations – Sustainable lighting models to optimize real-world energy consumption in smart factories.
FAQ’s
1) Why is proper lighting important in 3D renders for manufacturing industries?
Proper lighting in 3D renders improves realism, highlights product details, and ensures accurate visual representation for design validation and marketing in manufacturing.
2) What are the most effective lighting techniques for showcasing industrial machinery and components?
Three-point lighting, HDRI lighting and product-specific studio lighting are the most effective lighting techniques for showcasing industrial machinery and components.
3) How can I replicate realistic factory or warehouse lighting in 3D renders?
To replicate realistic factory or warehouse lighting in 3D renders, use large overhead area lights, add subtle volumetric effect depth, and layer warm/cool tones with strategic shadows for an industrial feel.
4) How do different materials (metal, plastic, rubber) affect lighting choices in product renders?
Metal needs sharp reflections and high-contrast lighting, plastic needs soft diffused light to avoid harsh highlights, while rubber requires subtle matte lighting with less glare.
5) Which software tools provide the best lighting controls for manufacturing-focused 3D visualization?
Software tools such as Blender, Autodesk Maya, DialUX, Cinema4D, etc., provide the best lighting controls for manufacturing-focused 3D visualization.
6) What lighting setups work best for technical animations and AR/VR applications in manufacturing?
For technical animations and AR/VR in manufacturing, use dynamic, shadow-optimized HDRI lighting with real-time global illumination for accuracy, adaptability, and interactivity.
Conclusion
In manufacturing, your 3D visuals need to be as accurate as your products. Proper lighting differentiates between a good render and one that truly represents your product.
At Arise Engineering Services, we focus on lighting that shows every detail correctly, works for your specific materials, and fits real-world manufacturing environments.
Better lighting means better decisions and stronger presentations.


")